Changing a string can be intimidating. I can vividly remember the day my parents brought my first, new to me, violin home. Believe me, when you live on an island in the middle of the Atlantic Ocean in the ‘90s, snail mail had new meaning. You can imagine how anticipated the arrival of a new violin was after borrowing a school issued instrument without a sound post for 4 years. When my brand new, full size Suzuki Nagoya arrived I was disappointed to find the strings loose and the bridge carefully folded in foam wrap and tucked beneath the tailpiece, protecting the instrument from metal damage that could be caused by the fine tuners landing on the body of the instrument during shipping. Nonetheless, I set about following the tiny sheet of pictorial instructions that came with the instrument. Being a pianist, I dutifully went to the piano and began to tune the instrument one string at a time. The A and D string tuned quickly and easily but that stubborn old G string snapped and stung me right on the right cheek. I can still the spot smarting from shock and embarrassment thirty years later (lol). How on earth would I tell my parents?! Again, island life, I had to wait a whole week to have my teacher replace the string. You can bet I watched her every move so that I would never have to wait to change a string again.
1. Thread the straight fabric wound end of the string into the corresponding peg.
2. Thread the ball/or loop end of the string into the corresponding fine tuner or hole in the tailpiece.
3. Place one or two fingers of one hand under the string in the middle of the fingerboard to engage the string and hold it in place.
4. Use the other hand to tighten the peg by rotating it clockwise until the excess length is secured around the peg.
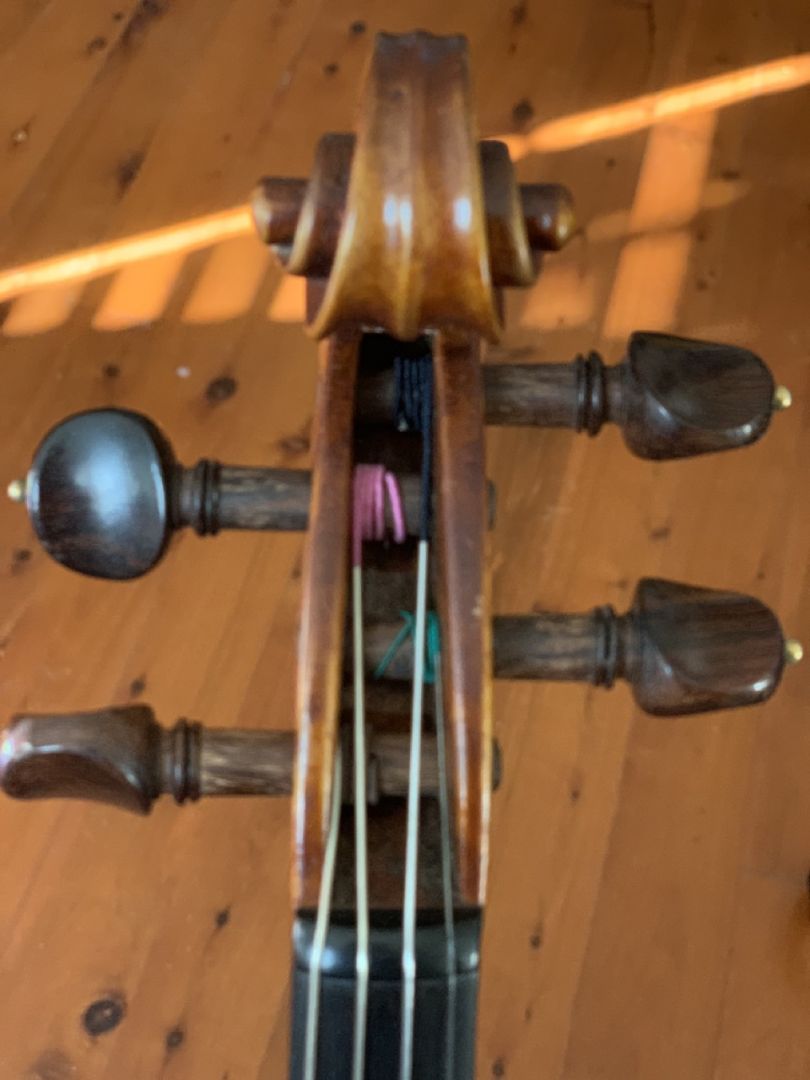
*Note the parallel winding technique used here.
I strongly encourage you to read these before attempting to change your instrument’s strings!
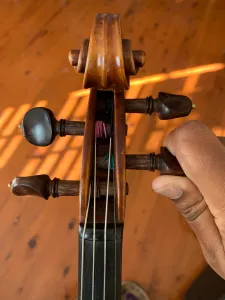
1. Place the instrument on a towel, on its back and on a flat surface before beginning. Alternatively, you may wish to hold the body of the instrument between your knees with the fingerboard facing you. I prefer this method. This method puts the pegbox at eye level, allows your hand to intuitively wind the peg and prevents a snapped string from hitting you in the face.
2. On the initial turn of the peg to tighten the string, you will want to create an ‘X’ by first guiding the string to wind onto the middle of the peg, followed by crossing the hole and continuing with the remaining revolutions working their way from the peg hole to the outer edge of the peg box. This method serves two purposes. You will secure the string from slipping out of the peg’s hole as well as clear the way for the next string to cross over the top the first string, preventing buzzing and stiff peg action.
3. Remove and replace 1 string at a time. Strings hold the bridge and soundpost in place. If either of these two items fall, it can adversely effect the beautiful of your instrument.
4. Straighten the bridge. This is best done when strings are a little loose. Enough pressure to keep the bridge upright is necessary but micro movements occur over time and the bridge may need to adjusted to sit in its natural groove at times. Give your bridge an inspection at eye-level. It should be at a 90 degree angle to the body of your instrument and its placement is usually evident by stress indentations from the feet of the bridge. If your bridge is severely warped, you should call your local luthier to repair it. This affects the tone, playability and overall aesthetic of the instrument and is worth keeping an eye on.
5. New strings take a day or two to stretch and settle. As such, you may find yourself tuning your instrument a little more frequently for the first few days. Similarly, you will notice a difference in sound. New strings tend to be brighter and have a little extra buzz as they settle. If you are changing your strings because you are curious about the difference in sound and quality of varying brands, remember to give the new strings a day or two to settle before making a decision on whether you like them or not.
6. Pegs. Sticky or slippery pegs can make changing strings and day to day tuning difficult. The first course of action for a sticky or slippery peg is to manipulate the depth which the peg is inserted into the peg hole by pushing or pulling further into or out of the peg box whilst tuning. In the event that a little more help is needed to rectify the issue it is always good to have a small piece of chalk &/or a No.2 pencil on hand. Remove the peg completely from the peg hole and apply chalk to the stem of the peg if it refuses to stick or No.2 pencil lead if peg is stubborn when turning. Some musicians prefer to use peg drops but in my experience if this is a persistent issue, it is actually worth having a professional luthier have a look. Similarly, if the peg’s tail end is pretruding more that a few millimetres out of the exit hole and you are finding tuning difficult, you should contact your local luthier to assess whether the peg holes need to be adjusted or if new pegs are needed.
7. Strings are sympathetic. The tone and tuning of each string is affected by the tone and tuning characteristics of the remaining strings. Therefore, it is advisable to stay within the same series or brand for a full set of strings
Now that you have changed your instrument strings it is time to tune them. Be sure to check out my video and instructions for tuning your instrument accurately and easily here.
Remember – New strings take time to settle and stretch. They will require frequent tuning at first.